
When deciding between a sugar scrub vs salt scrub, the right choice comes down to your skin type, sensitivity level, and where on your body you plan to exfoliate. Sugar scrubs use smaller, rounder granules that gently buff away dead skin while locking in moisture, making them ideal for dry, sensitive, or delicate areas. Salt scrubs feature larger, more angular mineral crystals that deliver intense abrasion, making them better suited for rough patches like heels, elbows, and knees.
If you have ever mixed a batch of homemade body polish in your kitchen, you already know that swapping sugar for salt completely changes how the scrub feels in the jar and behaves under warm shower water. Below, we break down the exact difference between sugar and salt scrub formulas based on hands-on DIY testing, skin barrier safety, and ingredient behavior—plus two simple recipes you can whip up in five minutes.
Sugar Scrub vs Salt Scrub: Quick Comparison Table
Before diving into the six key differences, here is a fast side-by-side breakdown to help you pick the right exfoliant at a glance:
| Feature | Sugar Scrub | Salt Scrub |
| Granule Shape & Size | Small, round, uniform crystals | Larger, coarse, angular crystals |
| Exfoliation Level | Gentle to moderate | Moderate to intense (heavy-duty) |
| Skin Hydration | Humectant (draws moisture into skin) | Slightly drying (absorbs surface oil) |
| Stinging Risk | Very low (safe after shaving) | High on micro-cuts, nicks, or shaved skin |
| Best Body Areas | Face, lips, arms, chest, bikini line | Heels, feet, elbows, knees, rough legs |
| Dissolving Speed | Melts quickly in warm water | Dissolves slower for longer scrubbing |
| Best Base Types | White sugar, brown sugar, raw cane | Fine sea salt, Epsom salt, Himalayan salt |
What Is the Difference Between Sugar and Salt Scrub? (6 Key Factors)
While both ingredients mechanically slough away dead surface cells, they interact with your skin barrier and carrier oils in completely different ways. Understanding these six differences ensures you get smooth results without irritation.
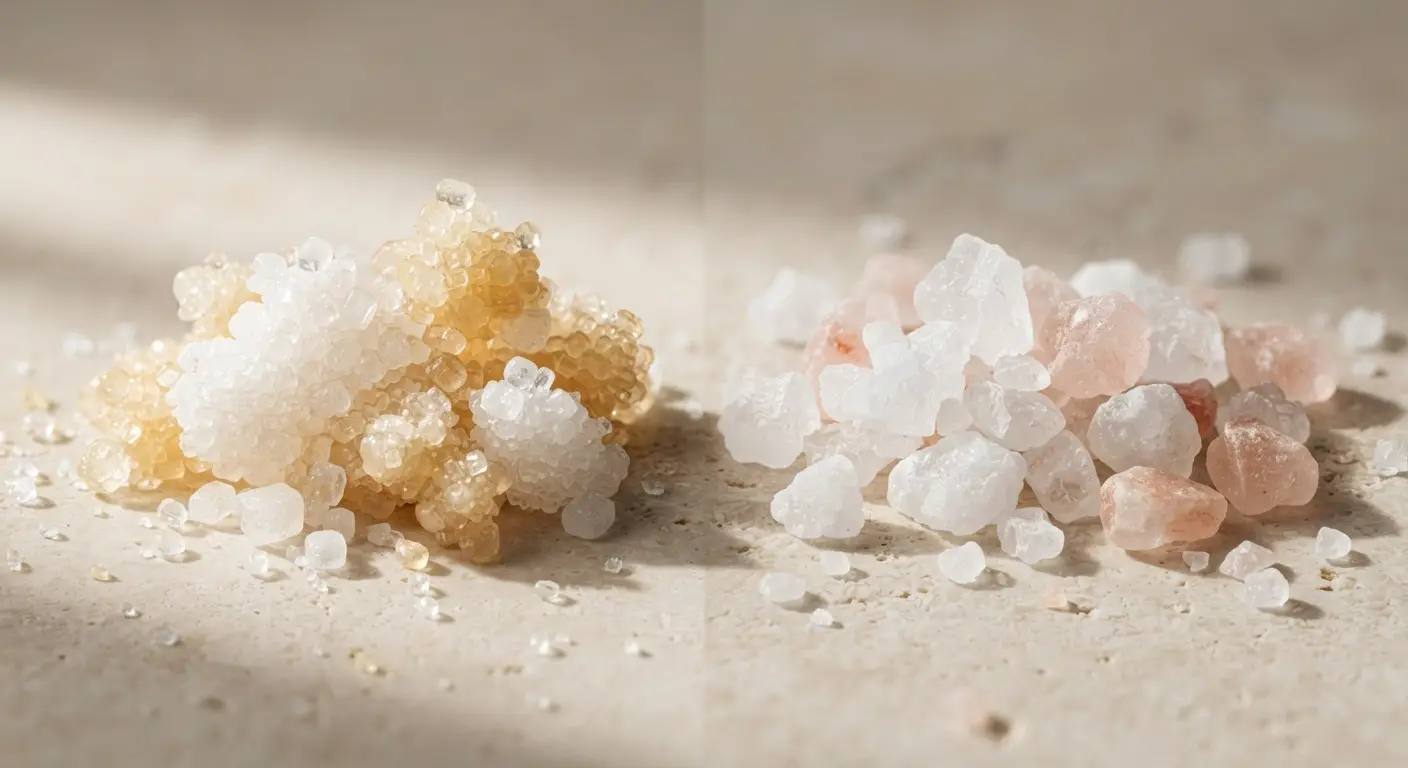
1. Granule Texture and Physical Abrasion
The most immediate distinction in the salt vs sugar scrub debate is particle geometry. Under close inspection, granulated sugar crystals have rounded, softer edges. As you massage them over damp skin, they roll smoothly and gradually melt from the warmth of your hands and shower steam.
Salt crystals—whether fine sea salt, Pink Himalayan salt, or Epsom salt—have sharper, more jagged edges. They do not melt as quickly when mixed with oil, meaning they maintain their gritty scrubbing power much longer. This makes salt unbeatable for breaking down thick, calloused skin on the soles of your feet, though it can cause micro-tears if used aggressively on thin or delicate skin.
2. Hydration vs. Deep Cleansing
Sugar is a natural humectant, which means it attracts moisture from the environment and helps bind it to your skin. Even after you rinse a sugar polish off, your skin retains a soft, cushioned feel. In addition, sugarcane naturally contains trace amounts of glycolic acid—an alpha-hydroxy acid (AHA) that gently loosens dead skin cells without harsh friction.
Salt works in the opposite direction. Because salt draws out excess water and surface impurities, a salt vs sugar scrub comparison always puts salt ahead for deep detoxification and clarifying oily, congested skin (such as the upper back or shoulders). However, because salt can leave skin feeling slightly tight afterward, you should always follow a salt treatment with a rich moisturizer or body oil.
3. Stinging, Sensitivity, and Post-Shave Safety
Anyone who has accidentally applied a sea salt polish right after shaving knows the immediate, sharp sting it causes. Salt penetrates tiny nicks, razor burn, and compromised skin barriers, triggering instant discomfort and redness.
Sugar does not sting broken or freshly shaved skin. In fact, many estheticians recommend using a fine brown sugar polish before shaving to lift trapped hairs and prevent ingrown bumps. If you have sensitive, reactive, or eczema-prone skin, sugar is the clear winner. To make sure you aren’t overdoing mechanical friction regardless of which base you pick, follow our step-by-step guide on how to exfoliate your body at home safely.
4. Best Body Areas for Each Scrub Type
Choosing between a sugar scrub vs salt scrub becomes much easier when you map them to specific zones of your body. Skin thickness varies dramatically from your face down to your heels, so using one formula everywhere rarely gives the best results.
-
Where Sugar Scrubs Shine: Use sugar on your face, lips, neck, chest, arms, and bikini area. Fine white sugar or ultra-soft organic brown sugar provides enough friction to clear away dry flakes without irritating thin skin.
-
Where Salt Scrubs Shine: Reserve salt for areas with thicker skin and higher keratin buildup—specifically your feet, heels, ankles, knees, and elbows. Salt is also the preferred choice before applying self-tanner, as it strips away stubborn dry patches that otherwise absorb uneven streaks of color.
If you are using a coarse salt polish to smooth cracked heels or rough feet, pair your shower routine with a heavy overnight barrier balm afterward—our DIY Sweet Dreams Cream works especially well to lock in moisture after intensive foot exfoliation.
5. Mineral Content vs. Natural Alpha-Hydroxy Acids
Beyond physical scrubbing, both ingredients offer secondary skin benefits depending on what your skin lacks:
-
Salt Brings Trace Minerals: Unrefined sea salt, Dead Sea salt, and Pink Himalayan salt contain naturally occurring magnesium, potassium, calcium, and zinc. When dissolved in warm bathwater or massaged onto damp skin, these minerals help calm surface inflammation, ease muscle tension, and support a healthy skin environment.
-
Sugar Brings Gentle Chemical Exfoliation: Raw cane sugar and brown sugar contain natural glycolic acid. While the concentration in a rinse-off scrub is mild, it works alongside the physical granules to dissolve the “glue” holding dull, dead skin cells together, leaving a noticeable post-shower glow.
6. How They Behave in DIY Jars (Oil Separation & Shelf Life)
If you make your own body care at home, you will notice a major practical difference in how these two bases mix with carrier oils like sweet almond, jojoba, or fractionated coconut oil.
In our hands-on kitchen tests, sugar absorbs oil more evenly and stays suspended in a cohesive paste for weeks, especially if you use brown sugar (which naturally contains molasses). Salt crystals are denser and heavier, meaning they tend to sink to the bottom of the glass jar over time, leaving a layer of oil pooling at the top. You simply need to stir a salt scrub with a clean spoon before each use.
Both sugar and salt act as natural preservatives in anhydrous (water-free) recipes because they create an environment where bacteria cannot easily grow. However, the moment wet shower hands dip into the jar, water is introduced and the shelf life drops rapidly. Always scoop your scrub out with a dry wooden spoon and follow safe exfoliation practices recommended by the American Academy of Dermatology to prevent over-exfoliation and irritation.

Sugar Scrub vs Salt Scrub vs Coffee Scrub: Where Does Coffee Fit?
While comparing a sugar scrub vs salt scrub, many DIY skincare fans wonder how ground coffee stacks up against the two classics. Coffee scrubs sit right in the middle of the spectrum—with a few unique perks of their own.
-
Texture: Finely ground coffee feels softer than coarse sea salt, yet slightly grittier and less melty than white sugar. Unlike sugar and salt, coffee grounds do not dissolve in water, which gives you continuous scrubbing control until you rinse them off.
-
Skin Benefits: Caffeine temporarily constricts blood vessels and boosts microcirculation, making coffee scrubs popular for reducing the appearance of puffiness, dullness, and uneven texture on thighs and hips.
-
The Mess Factor: Sugar and salt melt cleanly down the drain. Coffee grounds require a quick shower rinse afterward and a drain catcher if you use them frequently.
Want to test how coffee feels compared to sugar or salt? Try our easy coffee body scrub recipe for an energizing morning shower treatment.
How to Make Both at Home: 2 Simple 5-Minute DIY Recipes
Now that you know the exact difference in the sugar scrub vs salt scrub debate, the best way to see which one your skin prefers is to whip up a small batch of each. Both formulas are 100% water-free (anhydrous), meaning they stay fresh for up to two months in an airtight glass jar without needing chemical preservatives. You can also learn more about how sugar functions as a natural humectant in skincare from Healthline’s sugar scrub guide.
Recipe 1: Gentle Brown Sugar & Sweet Almond Body Scrub (For Dry & Sensitive Skin)
This soft, comforting scrub melts on contact and leaves a silky moisture barrier behind.
-
Prep time: 5 minutes
-
Yield: 1 small 6-oz jar
-
Ingredients:
-
1 cup organic light brown sugar (packed)
-
1/3 cup sweet almond oil (or jojoba oil)
-
1/2 teaspoon pure vanilla extract (or 5 drops lavender essential oil)
-
-
Instructions:
-
Combine the base: Add the brown sugar to a clean, completely dry mixing bowl and break up any clumps with a fork.
-
Add the oil slowly: Pour in the sweet almond oil and vanilla extract, stirring until the mixture resembles wet sand. If it feels too runny, add another tablespoon of sugar.
-
Store safely: Transfer to an airtight glass jar. Apply to damp skin in gentle circular motions once or twice a week, then rinse with warm water.
-
Recipe 2: Invigorating Sea Salt & Eucalyptus Foot and Body Polish (For Rough Skin)
Designed specifically for heels, knees, elbows, and pre-tanning prep, this mineral-rich scrub buffs away stubborn roughness fast.
-
Prep time: 5 minutes
-
Yield: 1 small 6-oz jar
-
Ingredients:
-
1 cup fine sea salt (avoid coarse rock salt, which can scratch skin)
-
1/2 cup fractionated coconut oil (stays liquid at room temperature)
-
6 drops eucalyptus or peppermint essential oil
-
-
Instructions:
-
Mix the salt and oil: In a dry bowl, stir the fine sea salt and fractionated coconut oil together until every crystal is coated.
-
Add essential oil: Mix in the eucalyptus or peppermint oil for a cooling, spa-like finish.
-
Use and stir: Scoop out with a dry spoon before stepping into the shower. Because salt settles at the bottom over time, give the jar a quick stir before each use.
-
Looking for more variations using honey, oats, citrus, or green tea? Explore our complete collection of 25 homemade body scrub recipes for every skin type and season.
Frequently Asked Questions: Sugar Scrub vs Salt Scrub
Below are clear, practical answers to the most common questions people ask when choosing or mixing body scrubs at home—including the specific details that quick online summaries often miss.
Can you mix salt and sugar for a scrub?
Yes, you can mix salt and sugar in the same DIY scrub, and doing so creates a balanced “medium-grit” exfoliator. A 50/50 ratio of fine sea salt and white or brown sugar gives you the deep smoothing power of salt while softening the abrasion and boosting hydration with sugar. This hybrid blend works especially well on legs and arms, though you should still avoid using a half-salt blend on your face or right after shaving.
Should I use a sugar or salt scrub for the bikini area or after shaving?
Always choose a sugar scrub for the bikini area and any skin you plan to shave—and use it before you shave, not after. Exfoliating with fine brown sugar prior to shaving lifts trapped hairs and clears dead skin cells so your razor glides closer without clogging. Never apply a salt scrub to the bikini line or freshly shaved legs, as salt crystals will cause intense stinging and irritation on micro-nicks and sensitive skin.
Is it better to scrub your face with salt or sugar?
Sugar is much safer for facial skin than salt, provided you use ultra-fine white or brown sugar and apply zero pressure. Facial skin is significantly thinner and more delicate than the skin on your body, and sharp salt crystals can cause microscopic tears and broken capillaries. Even with a fine sugar scrub, limit facial exfoliation to once a week and let the weight of your fingertips do the work.
Do salt scrubs dry out your skin?
Salt scrubs can leave your skin feeling temporarily dry or tight if the formula does not contain enough carrier oil or if you skip moisturizing afterward. Because salt draws water out through osmosis, it strips surface moisture along with dead skin. To prevent dryness, choose a salt scrub rich in nourishing oils (like sweet almond, avocado, or jojoba oil) and apply a hydrating body lotion or body butter within three minutes of patting your skin dry.
Which lasts longer in the shower: sugar scrub or salt scrub?
A salt scrub lasts longer during application because salt crystals have a higher melting point and dissolve much slower in warm water than sugar. If you enjoy a longer, firmer massage on tired feet, calves, or shoulders, salt holds its texture throughout your routine. Sugar dissolves quickly into a sweet, silky glaze, making it faster to rinse clean when you want a quick, gentle polish.
Final Verdict: Which One Should You Choose?
When weighing a sugar scrub vs salt scrub, you don’t necessarily have to pick just one forever—most people benefit from keeping both in their bathroom cabinet for different jobs:
-
Reach for a Sugar Scrub if you have dry, sensitive, or mature skin, want a safe pre-shave polish, or are exfoliating delicate areas like your chest, arms, and lips.
-
Reach for a Salt Scrub if you want to smooth rough heels, elbows, and knees, prep your skin before self-tanner, or deep-cleanse oily, congested skin on your back and shoulders.
Whichever jar you reach for, keep your pressure light, limit exfoliation to 1–2 times per week, and always seal in your fresh glow with a nourishing moisturizer afterward.
The My Beauty Box Review editorial team writes about DIY skincare, beauty subscription boxes and clean beauty. We link our sources and include safety notes. We are not dermatologists or cosmetic chemists.
